Add an Object as a custom field in OKR
Onboarding Guide
- Prerequisite before installing
- Installation
- Load Defaults
- Assign License
- Permission Set Assignment
- Enable Topics
- Setup Teams and Team Members
- Setup Periods
- General Settings
- Hub Default Settings
- Risk Colour Settings
- Default Settings
- Custom Fields
- Sobject/KPI Objects
- OKRify Settings
- Setup Email Notification
- Creating Calendar Event and Updating Meeting
Additional Setup Instructions
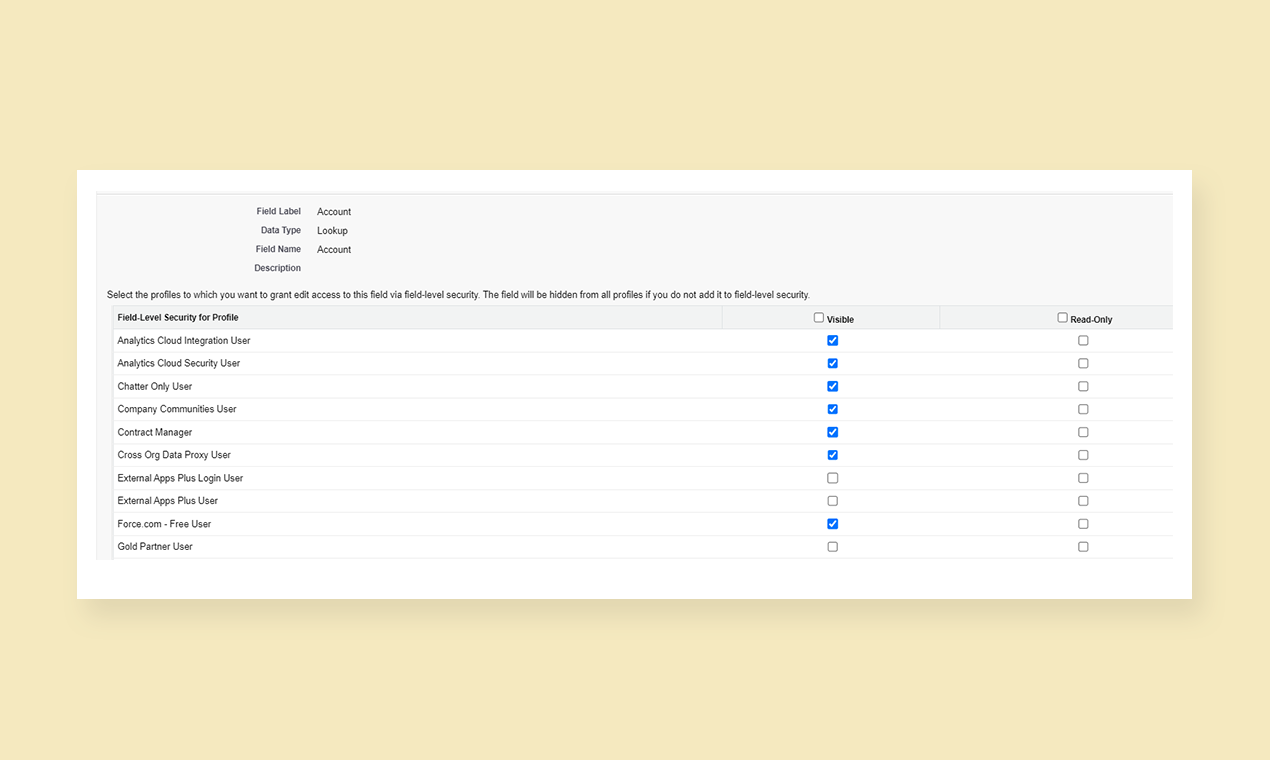
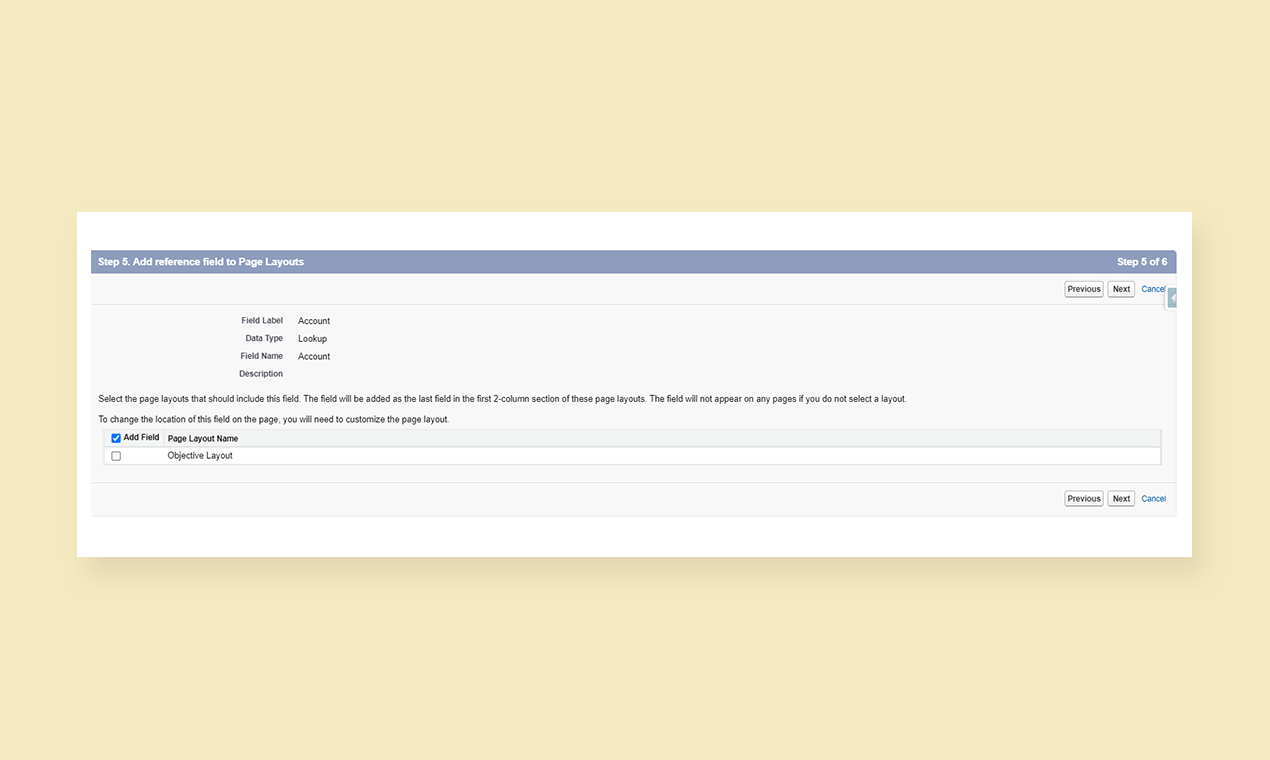
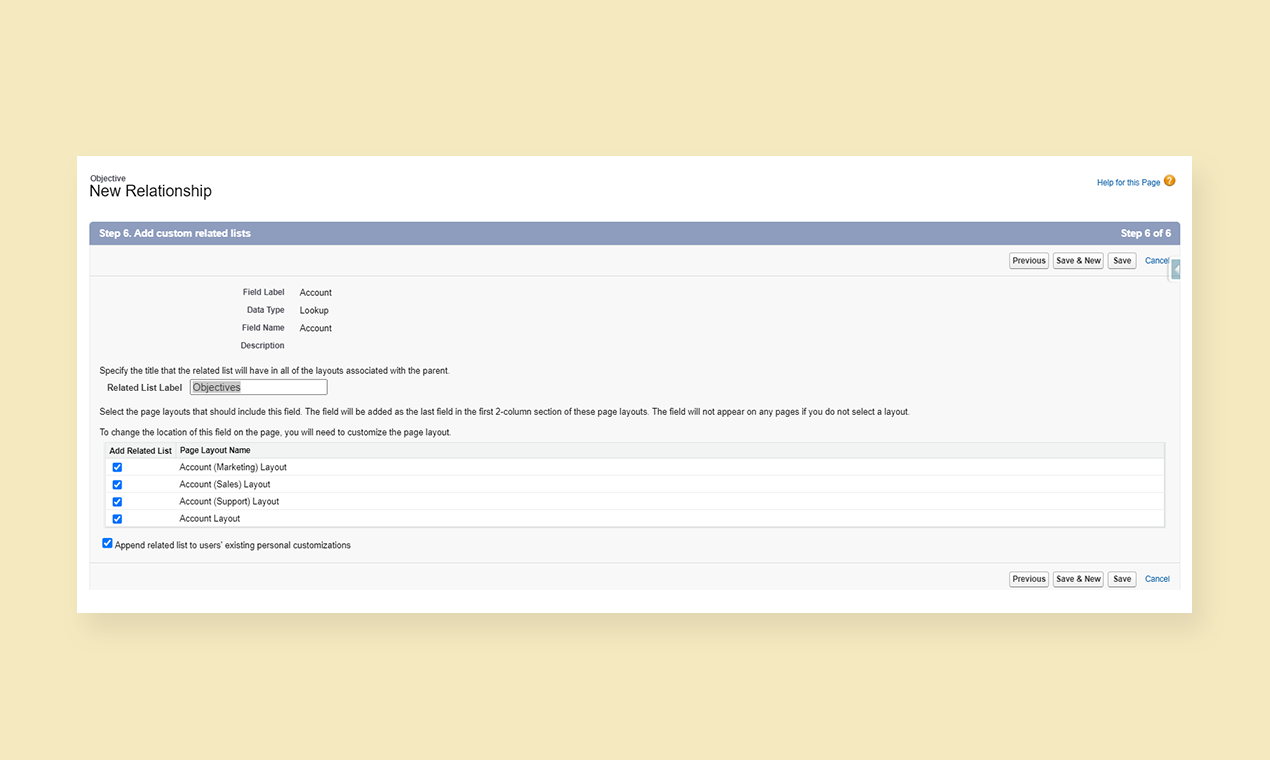
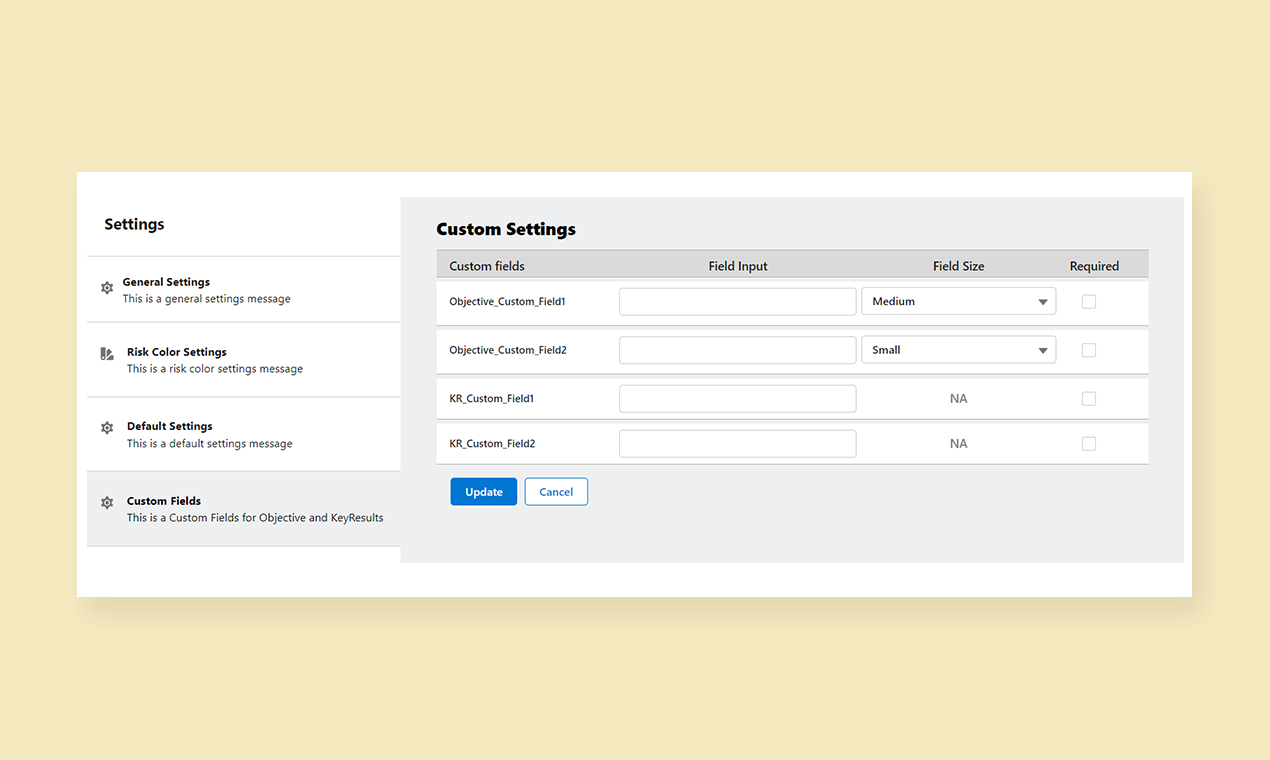
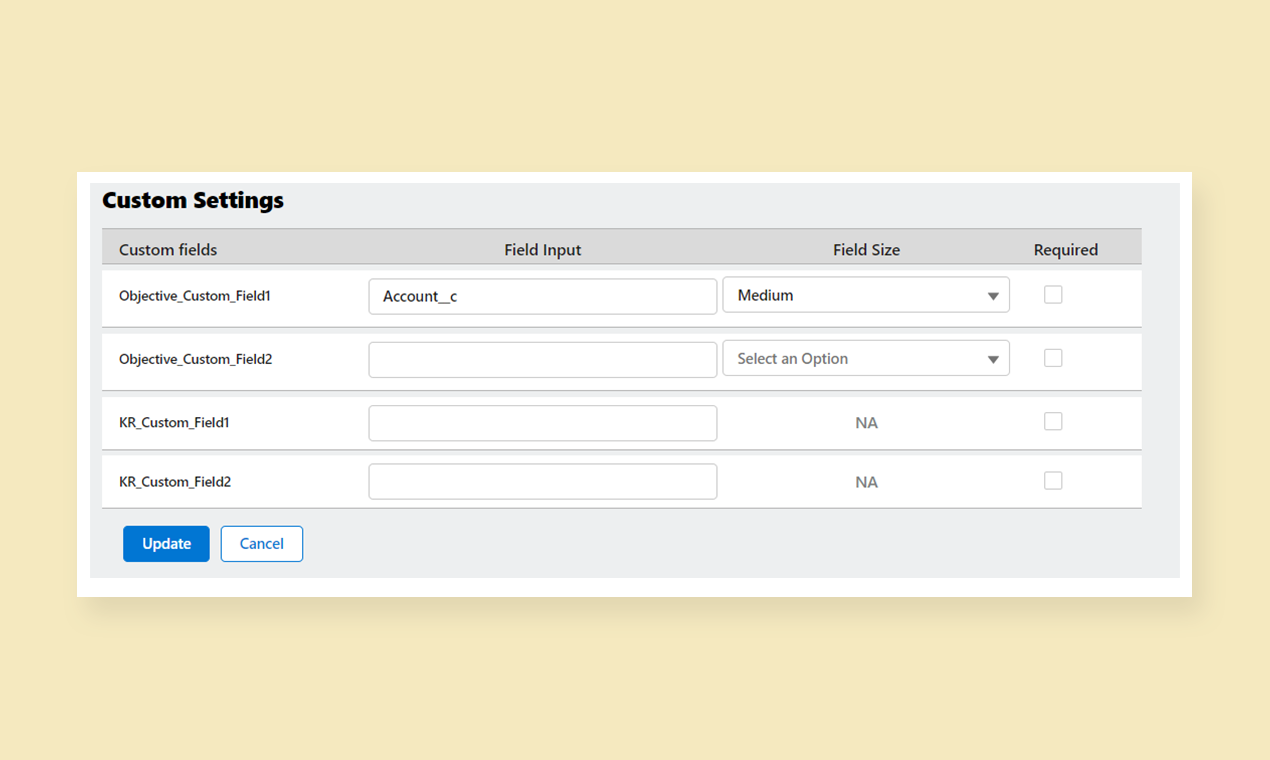
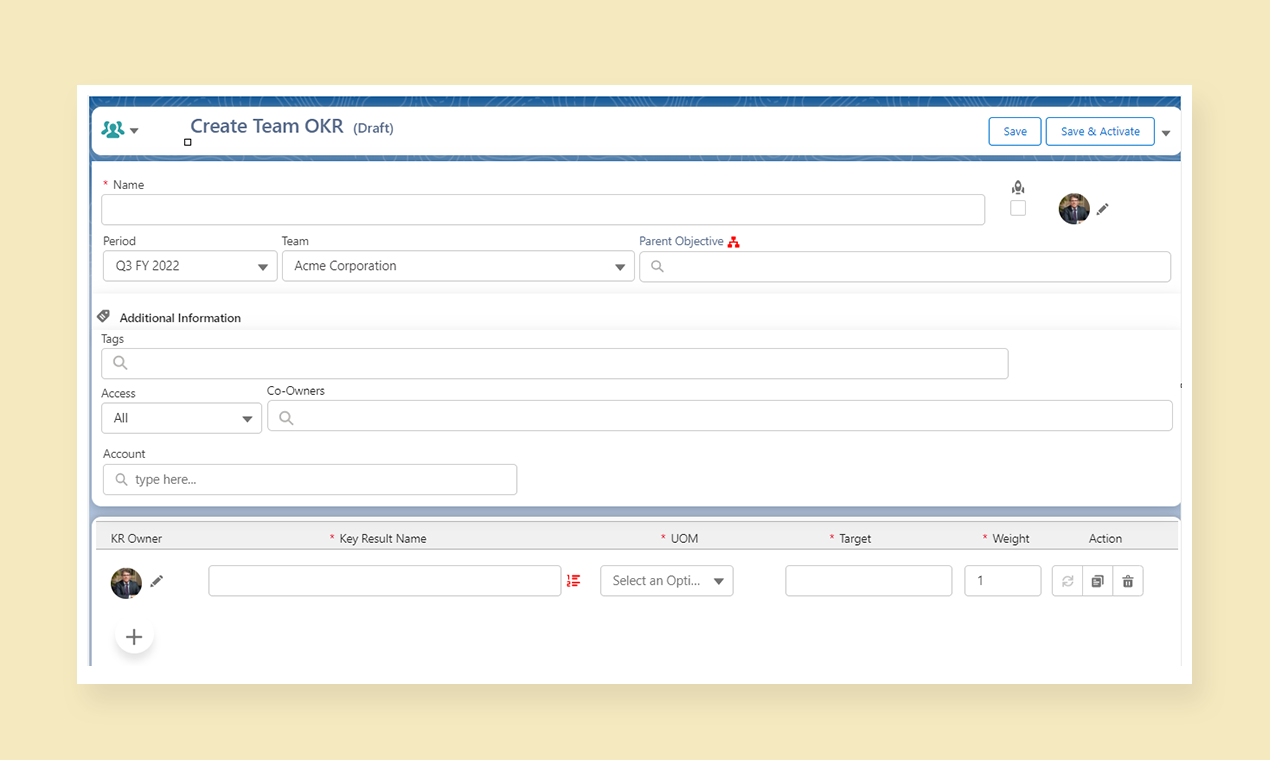
OKRify provides the ability to add two custom fields in the Create/Edit page, the custom fields can be of any field type and needs to be added to the OKRify’s Objective object. Any Salesforce object can also be added as a lookup field in OKRify’s Objective object and can be added as a custom field in the Create/Edit OKR page in the OKRify settings.
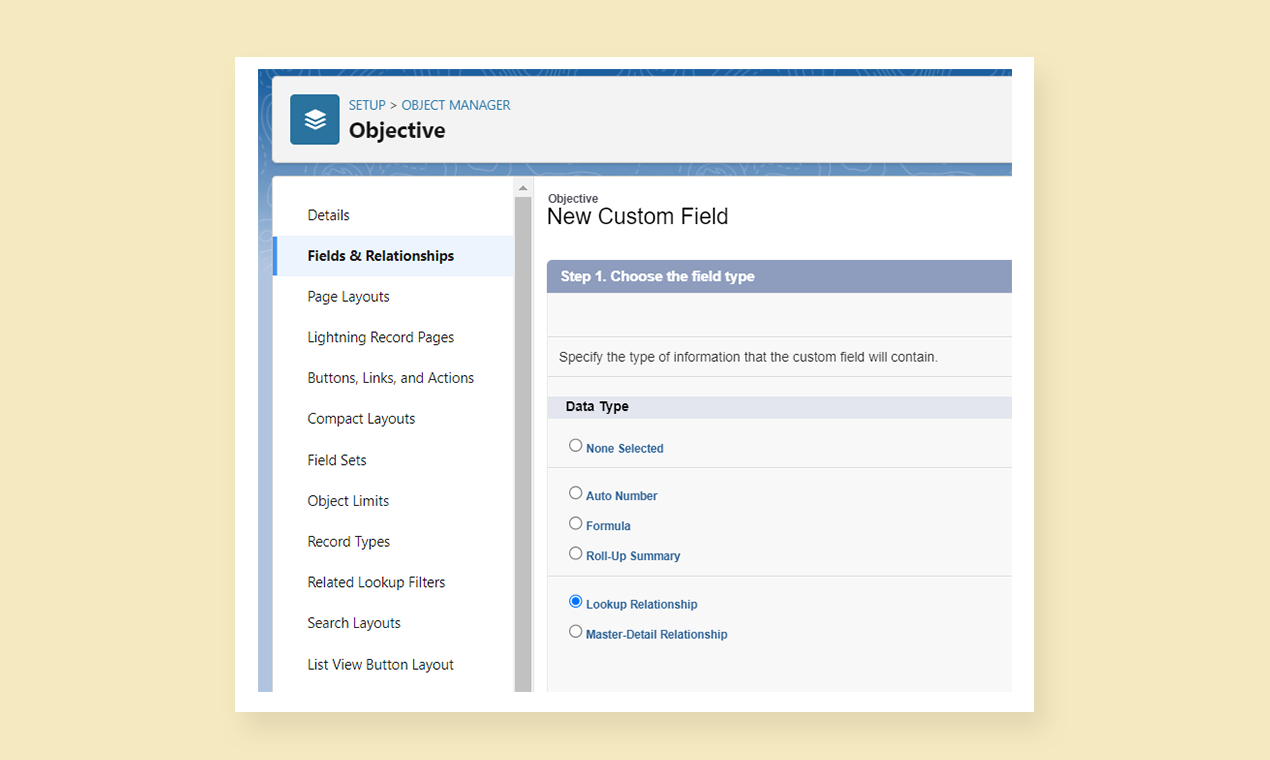
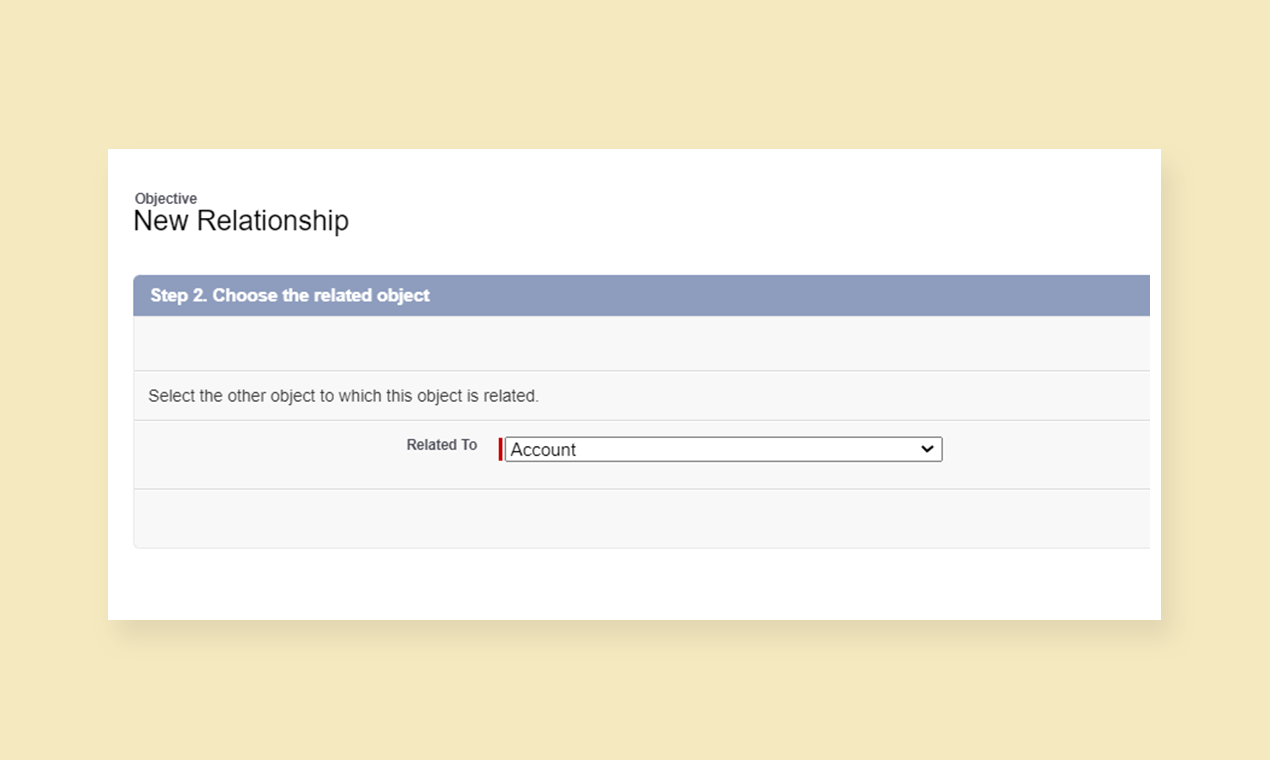
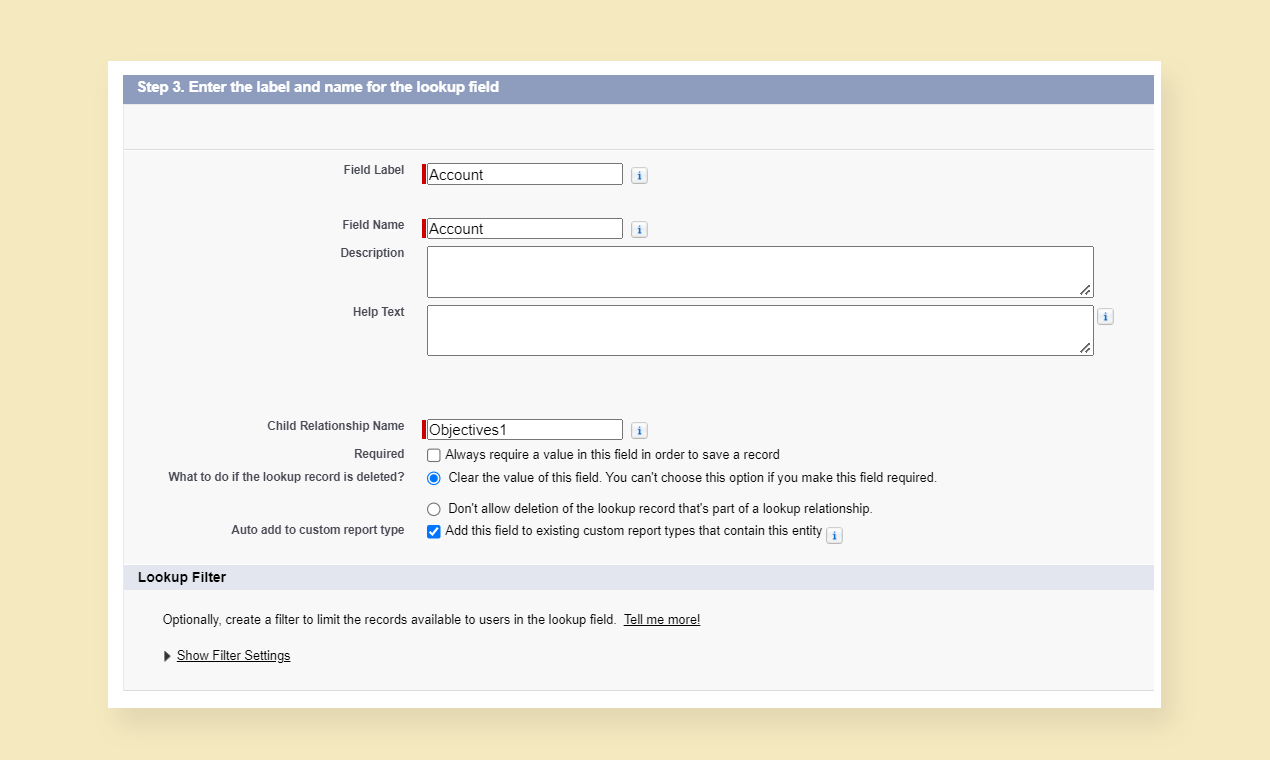
Please follow the below steps to add an object as a custom field in OKR
Steps to add Object as a Lookup Object in Objective
1.Go to Setup -> Object Manager -> Search for Objective Object
![](https://okrify.com/wp-content/uploads/2023/02/Add-an-Object-as-a-custom-field-in-OKR-1.png)
2.Click the Objective Object and Go to Fields & Relationship
![](https://okrify.com/wp-content/uploads/2023/02/Add-an-Object-as-a-custom-field-in-OKR-3.png)
3.Click New and Choose Lookup Relationship
4.Choose the Salesforce Object and click Next
![](https://okrify.com/wp-content/uploads/2023/02/Add-an-Object-as-a-custom-field-in-OKR-4.png)
5.Enter Label, Name, Description, Help Text and click Next
![](https://okrify.com/wp-content/uploads/2023/02/Add-an-Object-as-a-custom-field-in-OKR-5.png)
6.Select the profile to which to grant edit or read only access and click Next
![](https://okrify.com/wp-content/uploads/2023/02/Add-an-Object-as-a-custom-field-in-OKR-6.png)
7.Select the page layouts to which the field needs to be added and click Next
![](https://okrify.com/wp-content/uploads/2023/02/Add-an-Object-as-a-custom-field-in-OKR-7.png)
8.Click Save. Now the field is added to Objective Object.
![](https://okrify.com/wp-content/uploads/2023/02/Add-an-Object-as-a-custom-field-in-OKR-8.png)
Steps to add custom field in OKRify Settings
1.Go to Settings Tab
![](https://okrify.com/wp-content/uploads/2023/02/Add-an-Object-as-a-custom-field-in-OKR-9.png)
2.Click Custom Fields
3.Enter a new custom field’s api name created in the Objective object under Objective Custom Field 1 or 2 and select the field size.
![](https://okrify.com/wp-content/uploads/2023/02/Add-an-Object-as-a-custom-field-in-OKR-10.png)
4.New field is now available in Create OKR/View OKR Page
![](https://okrify.com/wp-content/uploads/2023/02/Add-an-Object-as-a-custom-field-in-OKR-11.png)